To set the locale in graphical displays

Before you localize strings associated with a control, ensure the string to be localized has been entered in the Solution Explorer > Language Translations table.
-
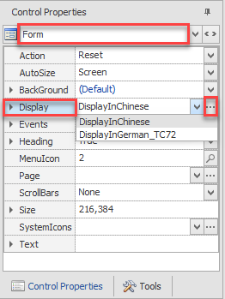
From Solution Explorer > Applications > [your application], open your application and select the Form. From the Form select the Displays property.

Click on the dots ...
-
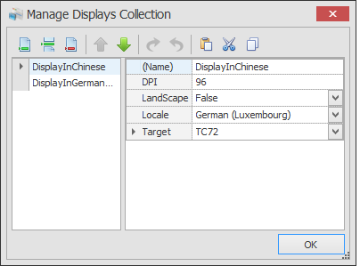
Create a new Display GUI by clicking on the
 add or insert icons in the ribbon menu. Add the your display's name, target device DPI value, the orientation of the device, select a locale, and the target device type.
Note: The Locale value here needs to match the Locale set in Language Translations.
-
To translate a caption, click on the property that contains the caption to be translated. If the drop down menu is blank, you many need to add the text string ID to the Solution Explore > Language Translation table.
You can manually (you type in the translated string) in the Solution Explorer > Language Translations and then have each display pickup the translated string, or you can use the Google Translation Engine to translate your strings for you and then have the values associated with your strings in the display. -
In the Caption property, expand the drop-down list.
An ID list displays. Select the text ID from this list. Click Save.
-
In the Form, change the Active Display property to the Display which is set the desire Locale.
-
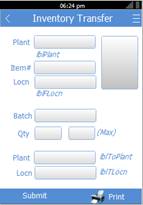
The translated text should appear in the prompt on the form.